Transforming a work desk
After she gave me several pieces of furniture that she wanted to get rid of, my aunt seemed won over by the upgrades brought to them. She asked me, this time, to make her a custom work desk.
This one has sentimental value and already has its assigned place in her magnificent home. You will see that it was also titled”back” beauty since its location is in the mezzanine with the back against the guardrails. It was therefore intended to be visible on all 4 sides.

Products used
Self-adhesive wallpaper
ModPodge Glue
Electric sandblaster
Portable propane torch
Wood Planer
Air compressor and finishing nails
Miter saw
Knife for paint paper (x-acto knife)
Molding for backing

Step 1 – Modifying the Furniture
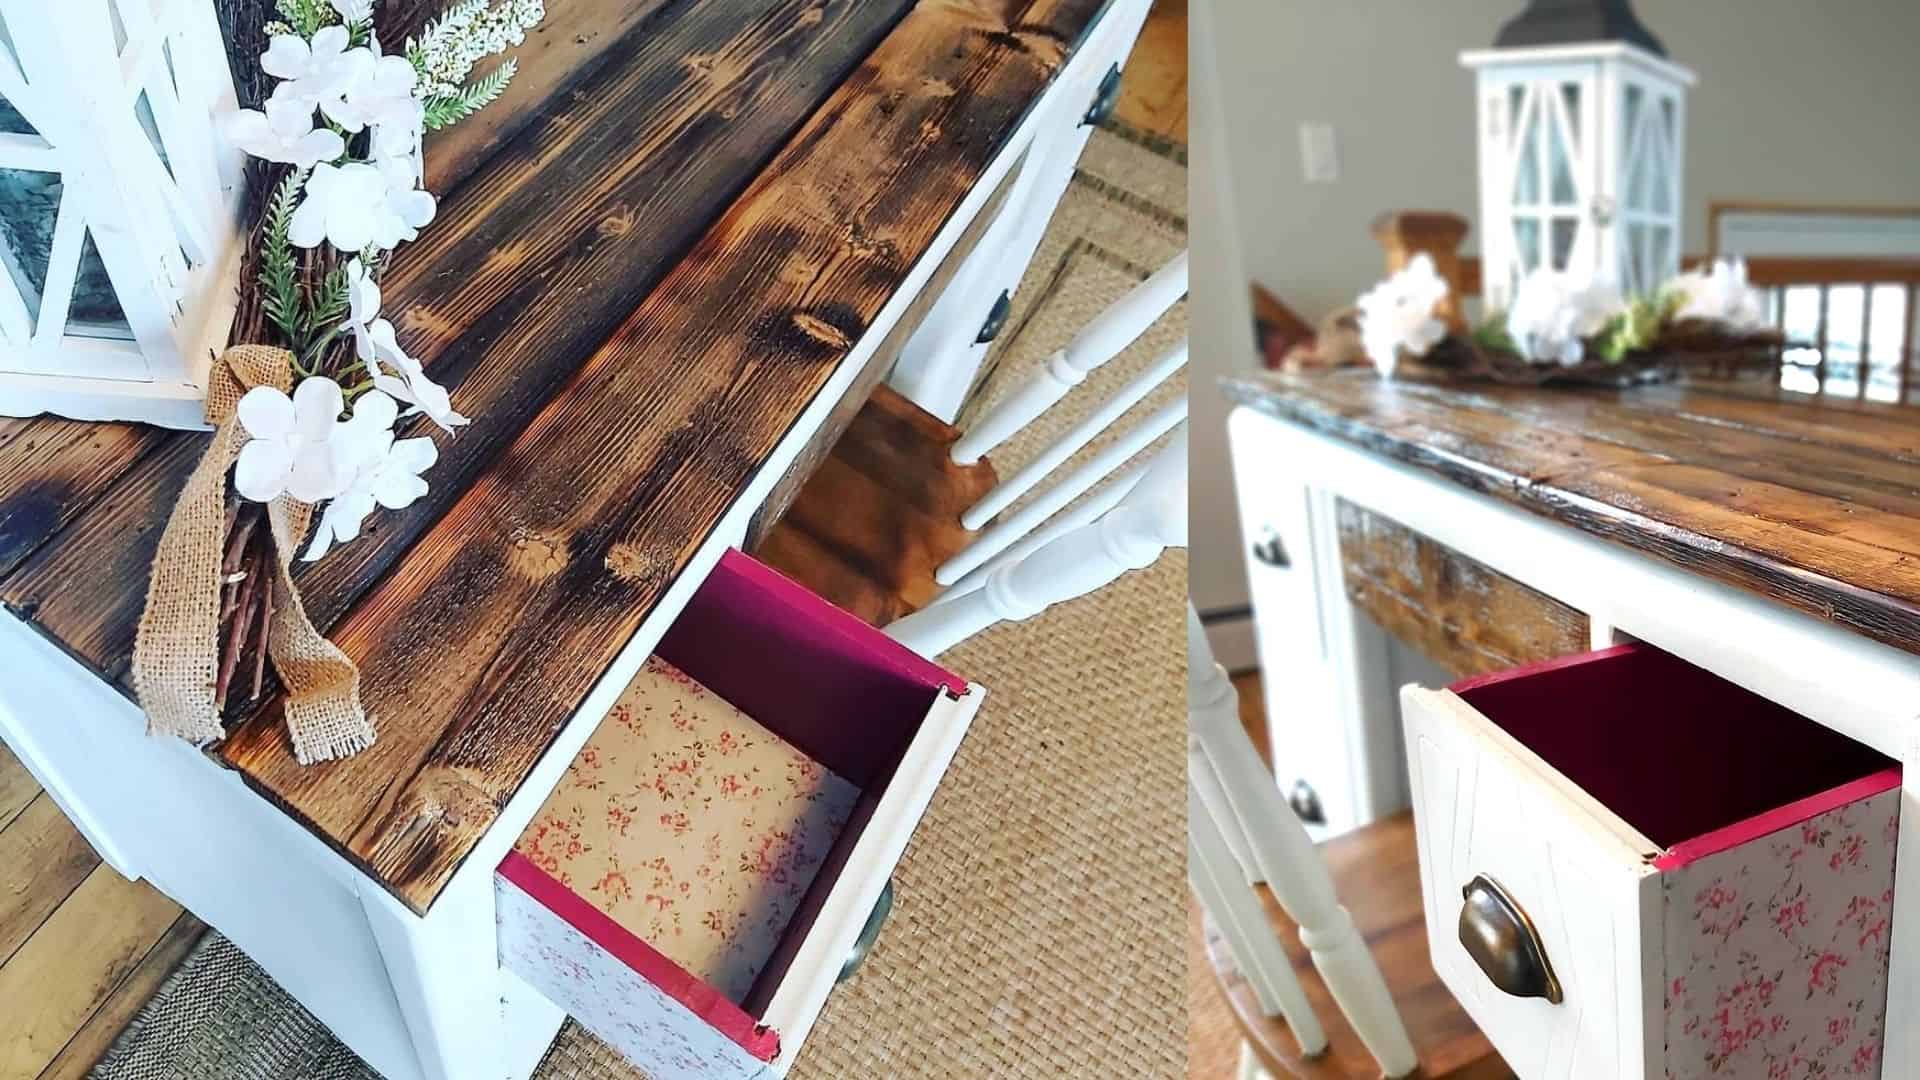
I tackled the top of the dresser to start. As this step creates a lot of wood chips and dust, I especially didn’t want to take the risk of damaging fresh paint. I first started by covering the top of the cabinet with old boards from an old sugar shack.
They were fixed with finishing nails and I passed the planer in order to even out the imperfect boards as much as possible. The center drawer did not have the same effect as the rest of the cabinet, as it had likely been replaced over time. Question of harmonizing it with the top, I replaced its front with a similar board.
Step 2 – Finishing the Wood Planks
I mechanically sanded the boards with a coarse paper to prevent the wooden sides from coming out. As the planks were aged over time, the grain had faded in some sections that I had reworked. So to make them similar to the rest of the old planks. I burned with a torch to blacken the desired places and gave them a rustic appearance. Since I wanted to make the top of the chair look the same, I also randomly burned a few spots.
To make it as smooth as possible, I mechanically sanded with fine paper, making sure the sides were safe. Once it was to my liking, I blew it off using an air compressor to remove any excess wood dust. I applied 3 coats of Colorantic Matte Varnish on the boards, with a light sanding between each coat.
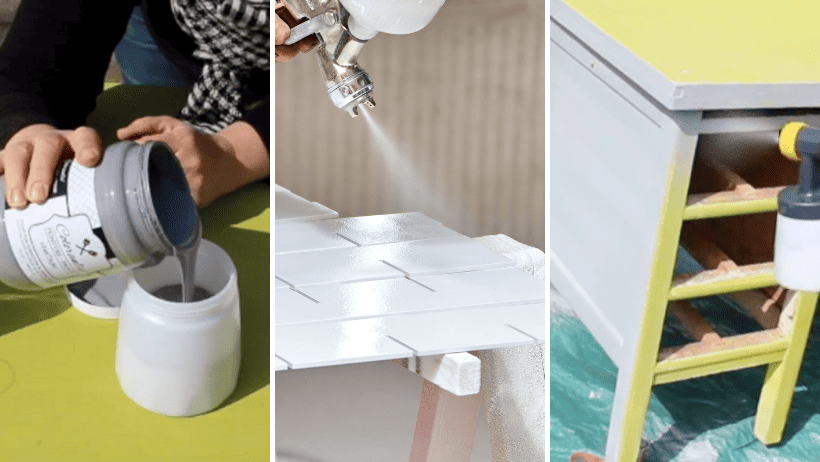
Step 3 – Prepare and Apply Colour
Once the boards are finalized, I now tackled the rest of this beauty in the making. I removed the drawers and washed each surface to be painted with Cleaner and Varnish Remover. Once rinsed and dry, I applied a single coat of the primer to ensure good adhesion of the paint.
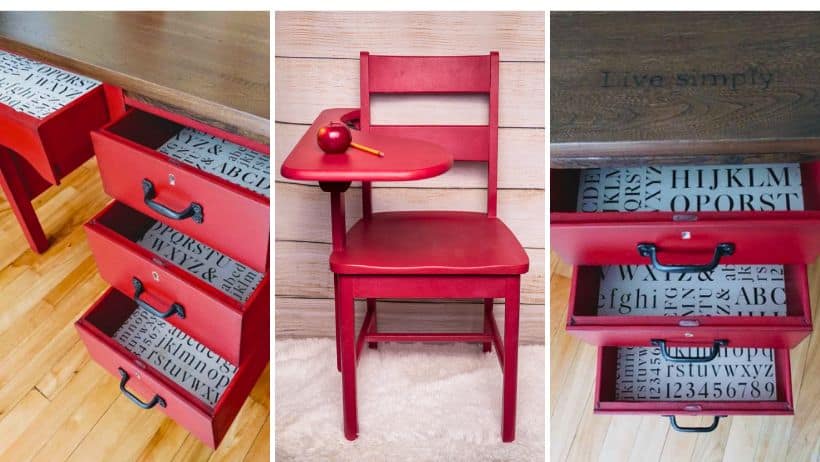
I applied a first coat of the colour Cotton Ball on the furniture as well as on the back and the legs of the chair. Then I also applied a first coat of the colour Sangria on the interior sides of the drawers, which will harmonize well with the wallpaper. I repeated the procedure once it is dry.
Step 4 – Finishing the Work Desk
After applying 2 coats of paint, it’s time to varnish. One single coat was enough, making sure to varnish every place that was painted. I finally applied the wallpaper previously measured and cut using an ” x-acto knife ” and MudPodge glue.
This adds a unique effect when opening the drawers. I also applied wallpaper to the back of the dresser, on the upper part. I separated the painted part with a pine molding, which will also join the effect of the wood on the top.

So now is the time to put the furniture back in place: drawers, chair and handles find their place. It goes without saying that once assembled, this romantic and vintage-style chest of drawers won me over. I couldn’t wait to present it to its owners! They were charmed, and they are convinced that the recovery of old furniture remains a most sensible option when it comes to the history and the quality of our good old wooden furniture.
Related Posts