Furniture Transformation with Chalk Paint Colours and Blending Effects
When I changed from a sports car to an SUV, I realized that I could finally make my dreams of furniture upcycling come true. My new vehicle would allow me to transport all the furniture I wanted.
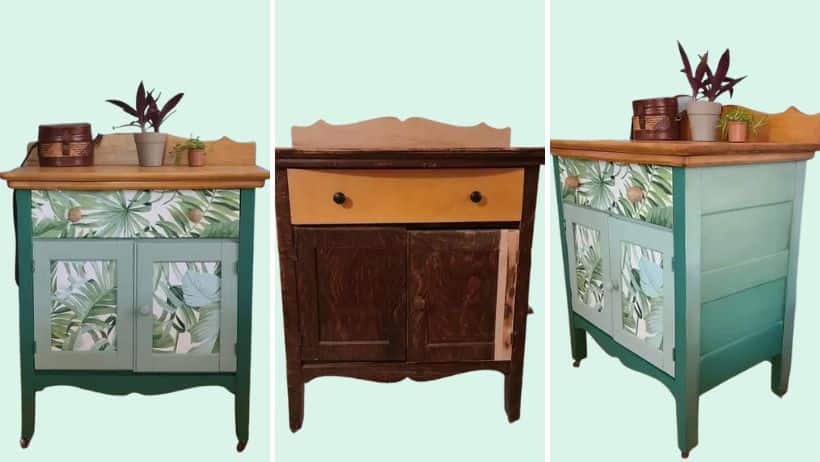
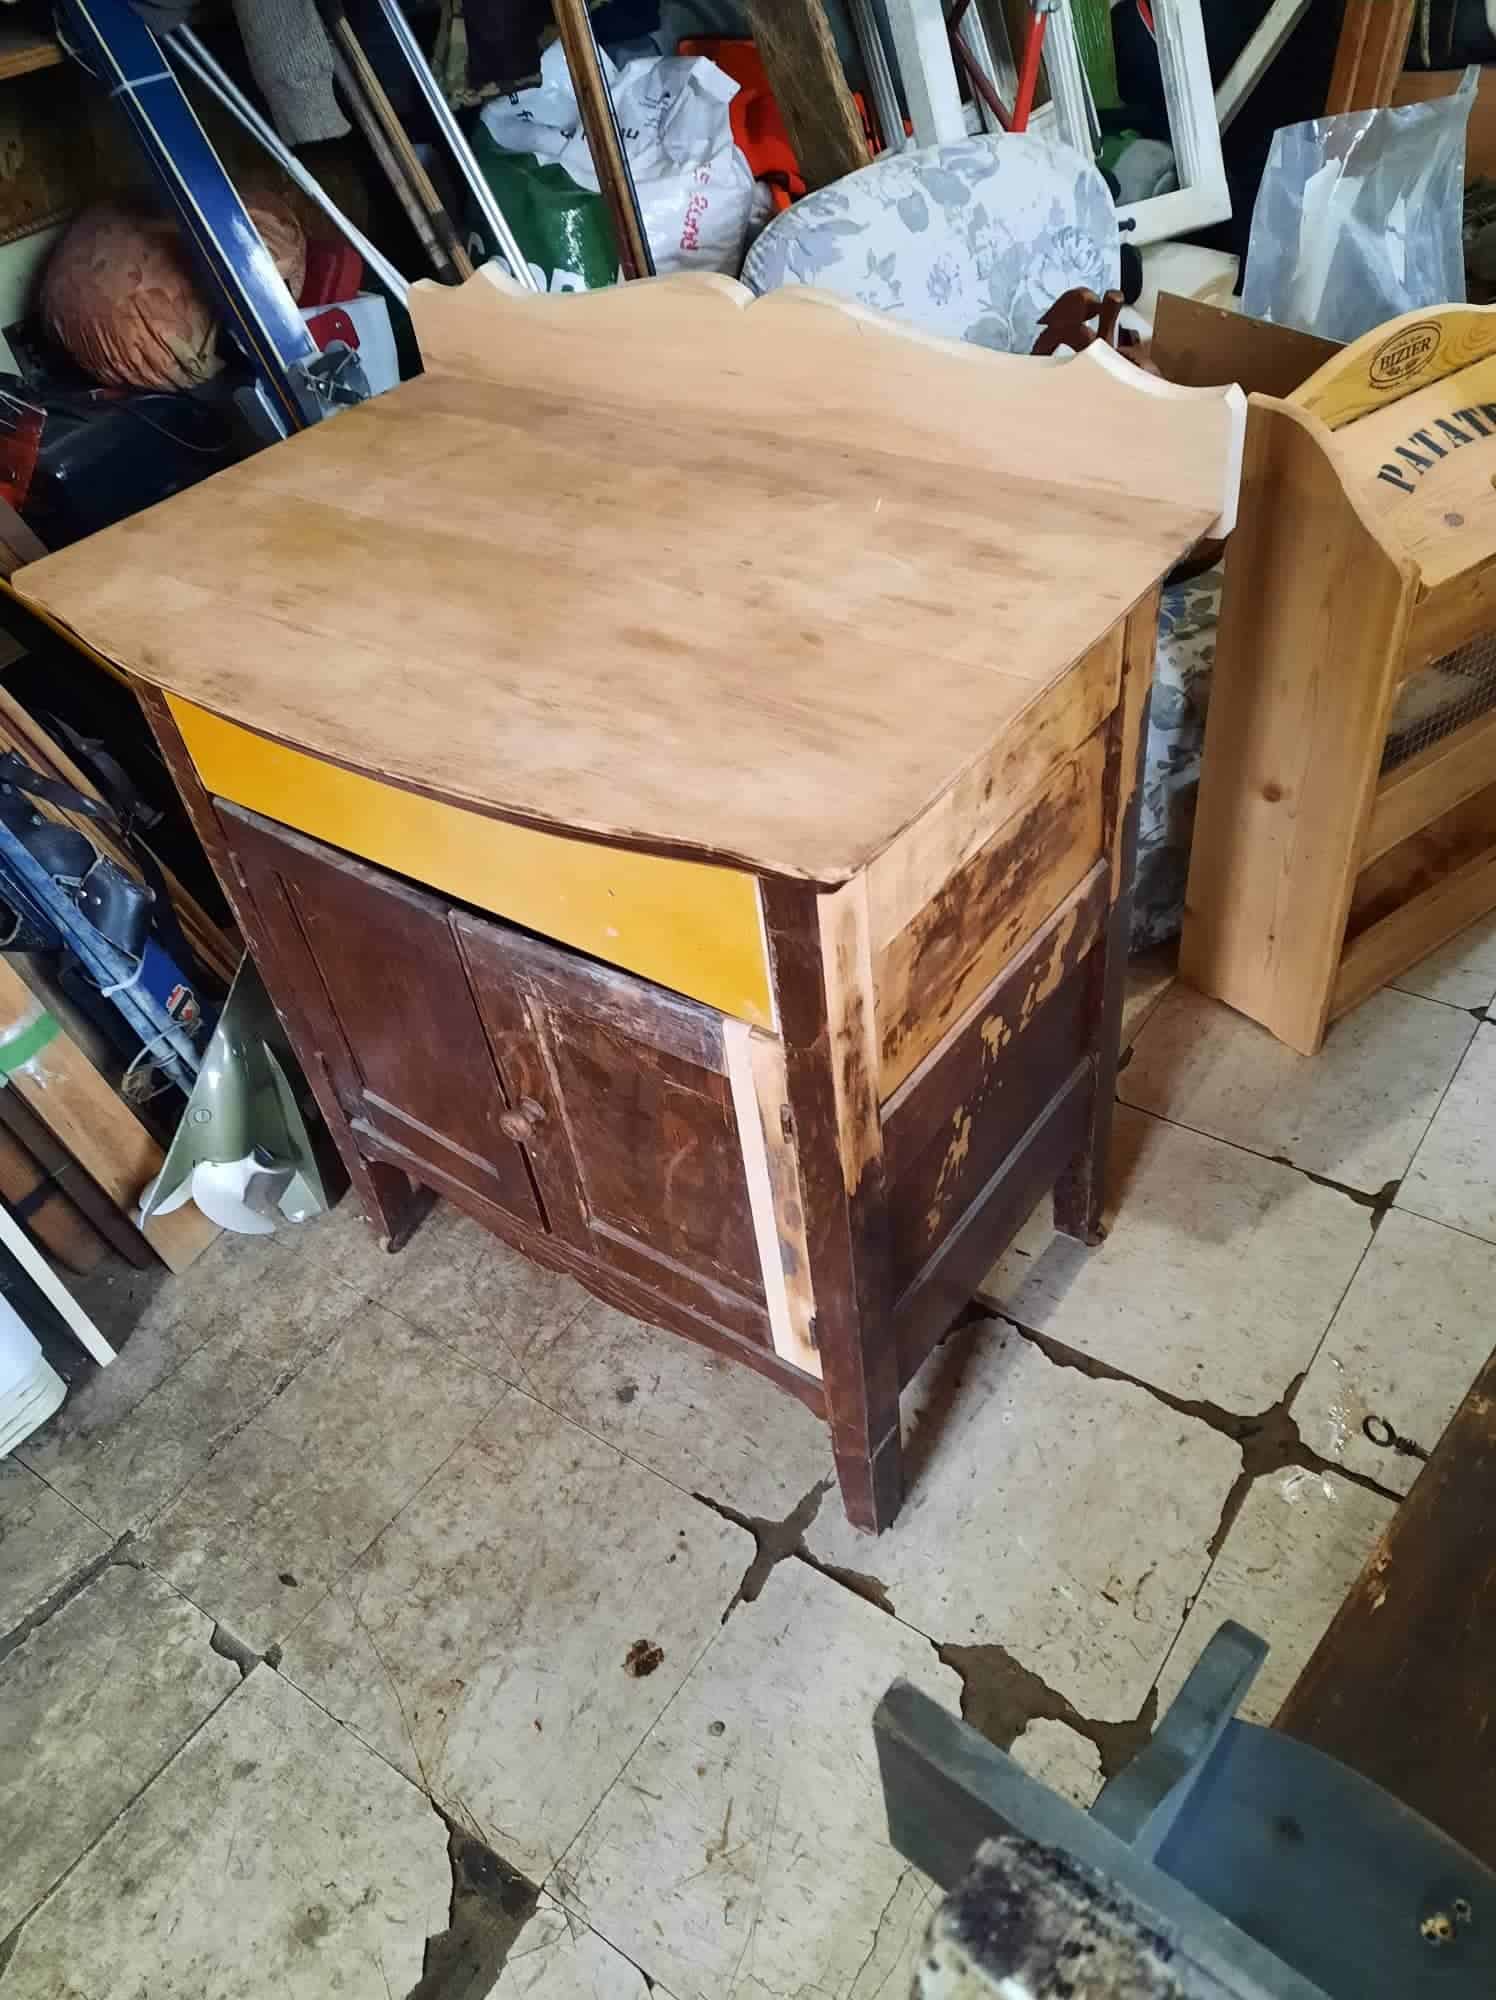
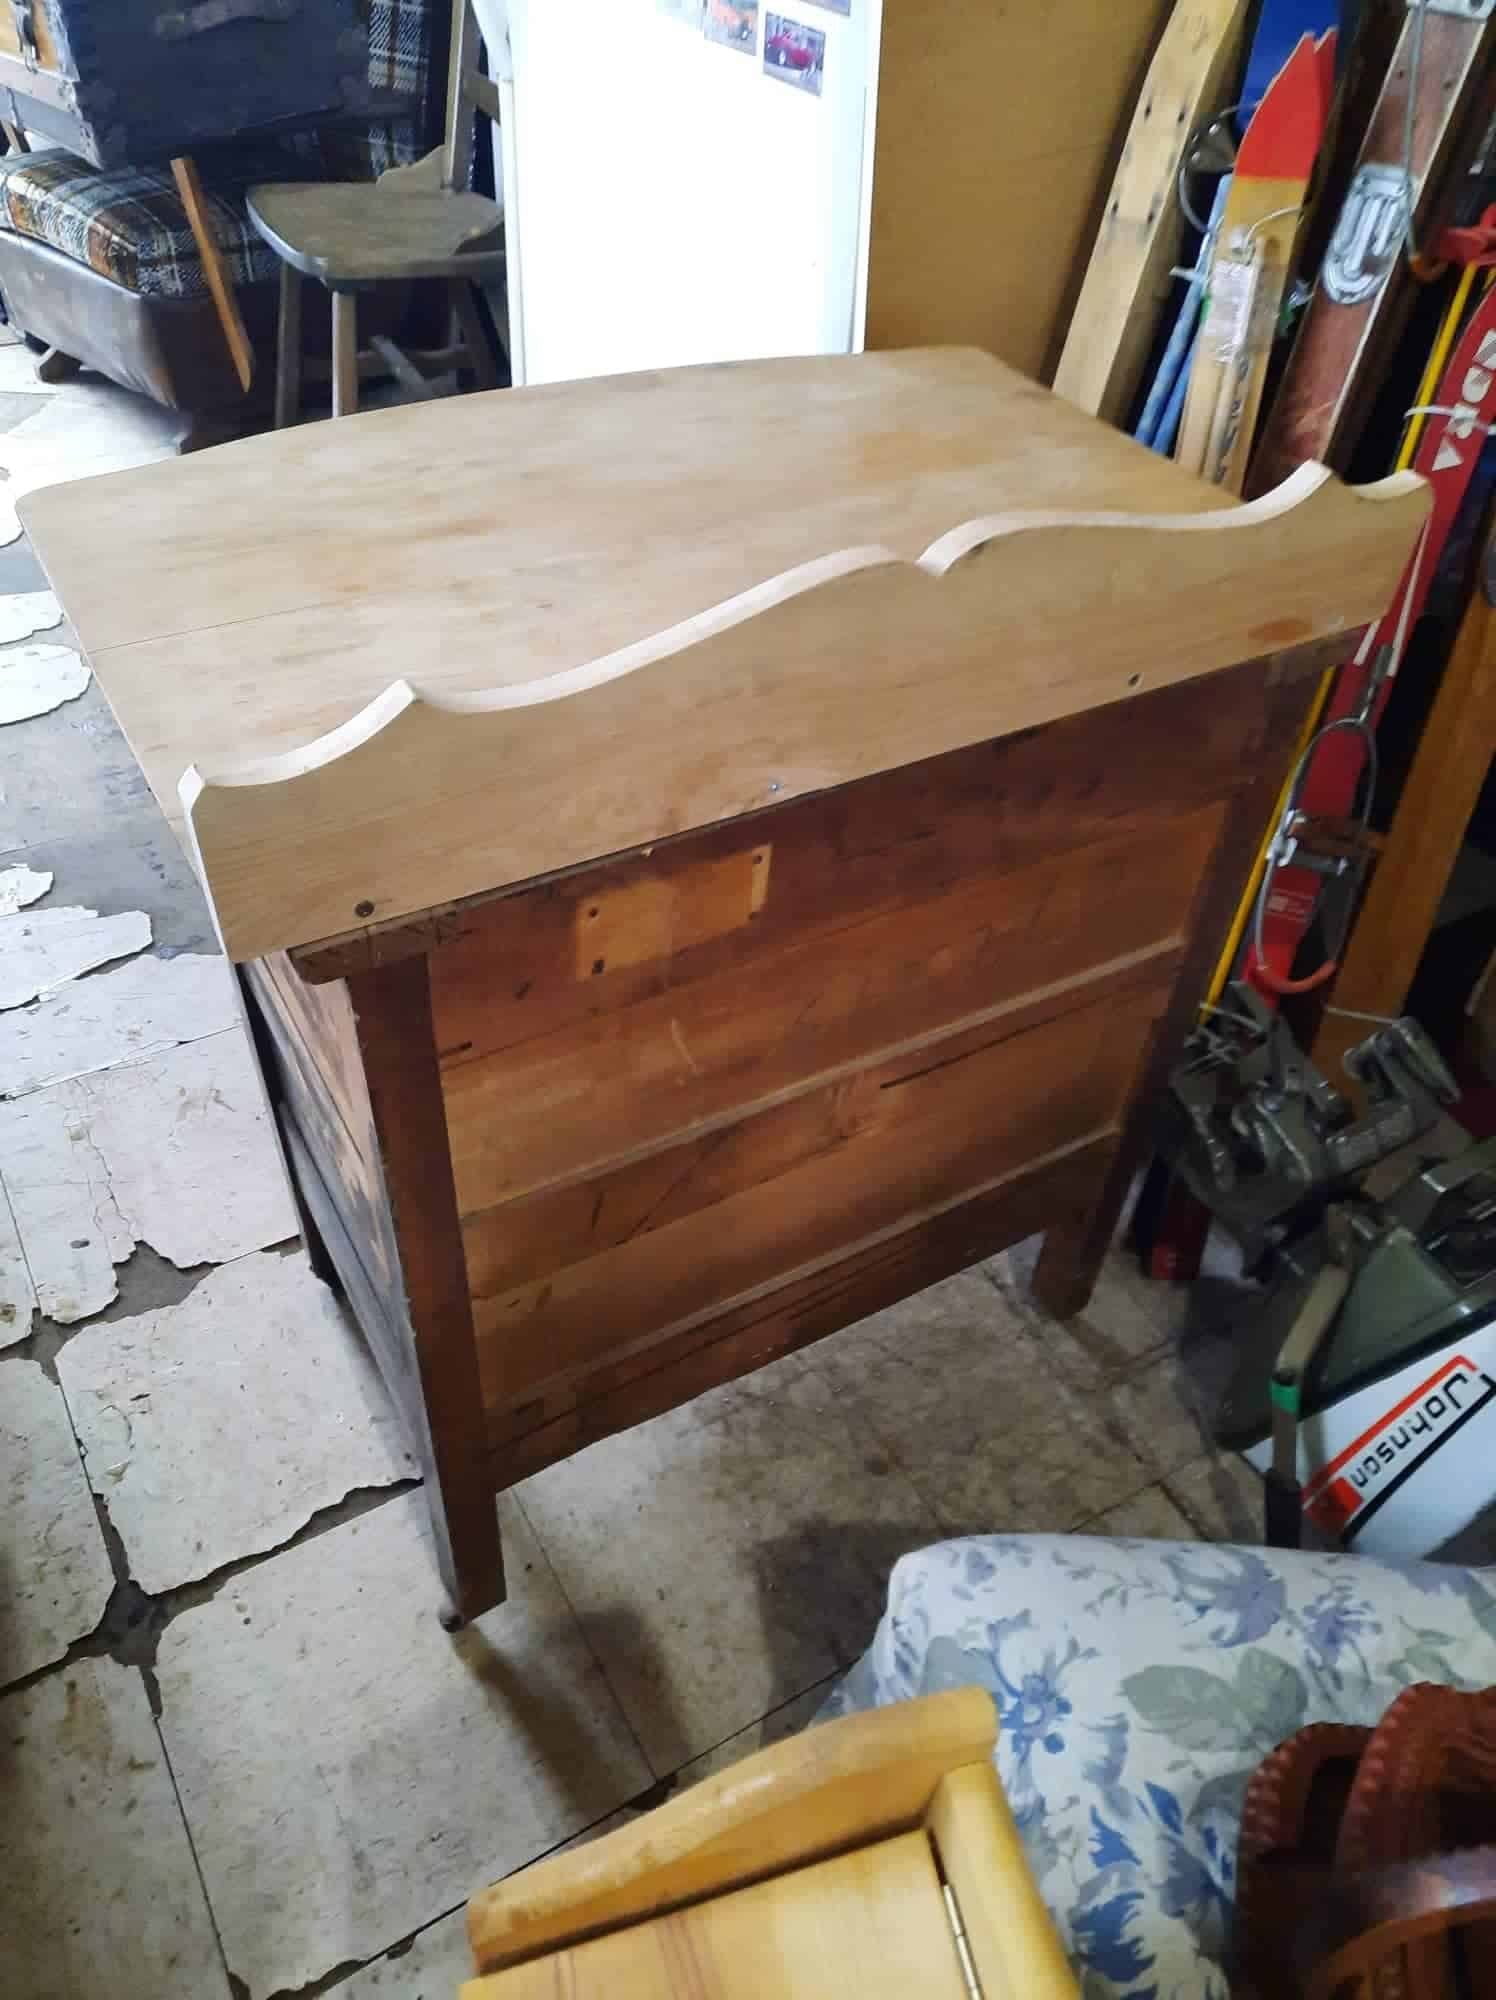
Several years ago, my mother renovated a piece of furniture which majestically brightened up her bathroom and ever since, I have been overwhelmed by the idea of repurposing old furniture. So, when I saw this beauty in poor condition, I couldn’t resist: I had to buy it!
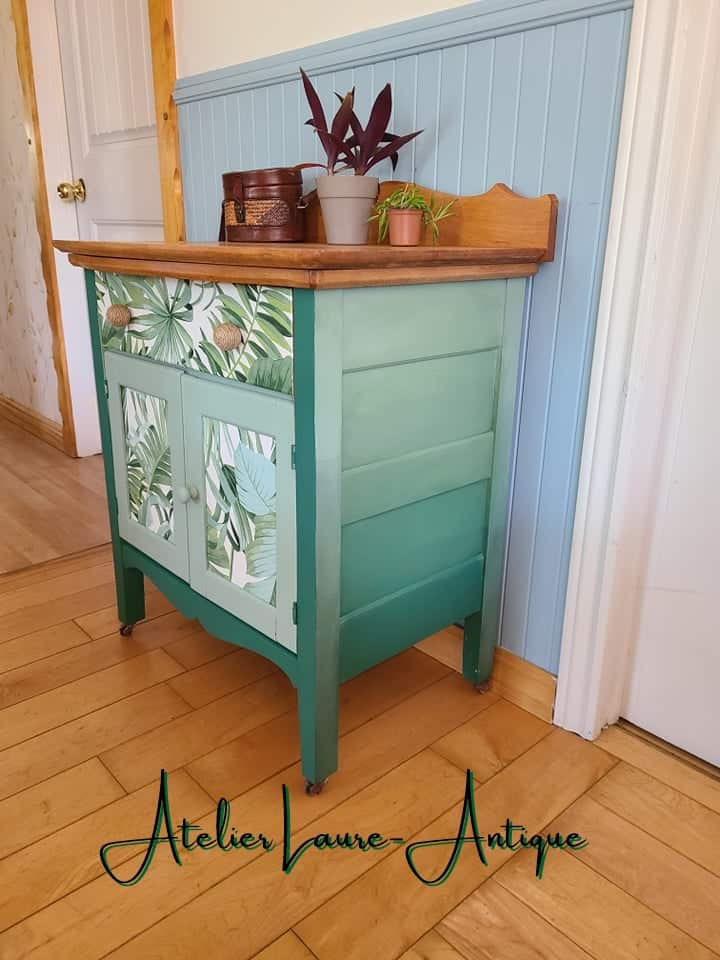
Why not transform this piece of furniture with a colour gradient? As you read below, you will find all the steps I performed to arrive at the final result.
Products used
- Colorantic oil-based all-purpose primer
- Colorantic Emerald chalk paint
- Colorantic Ocean chalk paint
- Colorantic nail polish remover cleaner
- Colorantic chalk paint: Sage
- Colorantic Nature chalk paint
- Colorantic natural beeswax
- Colorantic decorative handles
- Colorantic matte varnish
- Purple oval brush #6 synthetic and snow white
- XL Colorantic brushes
- Colorantic two-grit sandblasting block
- Mist sprayer
- Blue shop towels
![]()
Preparation
- First, remove the hardware.
- Next, clean the furniture. For a perfect job, I strongly suggest you use the cleaner and varnish remover from Colorantic. Spray and leave for 30 minutes. Next, it is very important to rinse thoroughly using a well wrung out warm cloth. Repeat twice. This will remove any residue left by the cleaner.
- Sand lightly all surfaces and ensure you dust very well.
- Apply a coat of Colorantic Oil-Based Primer. This allows you to make the transition between the old oil-based varnish and the new water-based paint, sparing you the task of stripping.
Applying Paint
- First, I applied a coloured based coat with the colour Sage, everywhere, except the top. It will remain in natural wood.
- For the colours, I did some “trial and error” when mixing the colors, to finally find the right shades for my gradient.
Dark: A mix of Emerald and Nature (the front of the furniture)
Medium: A mix of Nature and Sage
Pale: A Mix of Sage and Ocean (the outline of the doors)
- For the top of the furniture, I wanted to keep the natural wood, but the colour was too pale. So, I stained the wood with Varathane varnish stain, in the colour Golden Pecan.
- A thin layer should be applied with a brush. For my part, I prefer to use a dye sponge until the desired shade is reached.
BLENDING (gradient effect): When I watched blending videos online, it looked so easy. Let me tell you: it takes a lot of patience and practice. On the other hand, the result takes your projects to a whole new level.
First of all, we must give a uniform base coat, in this case, the colour Sage.
Then, we must work in sections. The paint dries very quickly so we need to mist with a spray bottle, as this helps keep our paint wet.
We need a brush for each colour. Use another clean dry brush to blend the colours.
Finishing
- To finish, we apply Colorantic natural beeswax.
To apply the wax, I advise you to use the large XL brush. Work in sections of approximately 2 square feet. Apply wax randomly and buff using a blue workshop paper towel. At first you will feel resistance and when the wax is well polished you will feel your hand slipping. It is very important to change paper towels for each section.
The wax can take seven days to dry and even longer in some cases, depending on the humidity level in the house.
Conclusion
With practice, nothing is impossible. Before blending on a piece of furniture, I advise you to try it on small pieces of wood. If the result is not successful, it’s less disappointing than having to start the entire piece of furniture again, believe me.
My transformation project was very interesting to do. Creating a colour gradient was very fun and still easy to do if you have the time and, above all, the patience!
For more decorating ideas, visit the Facebook group: Trucs & décos de tout genre:
Join our English Colorantic group
Subscribe to our newsletter:
Newsletter
Facebook
Instagram
Pinterest
Etsy
Amazon Canada
YouTube
Tiktok
Related Posts