Introduction
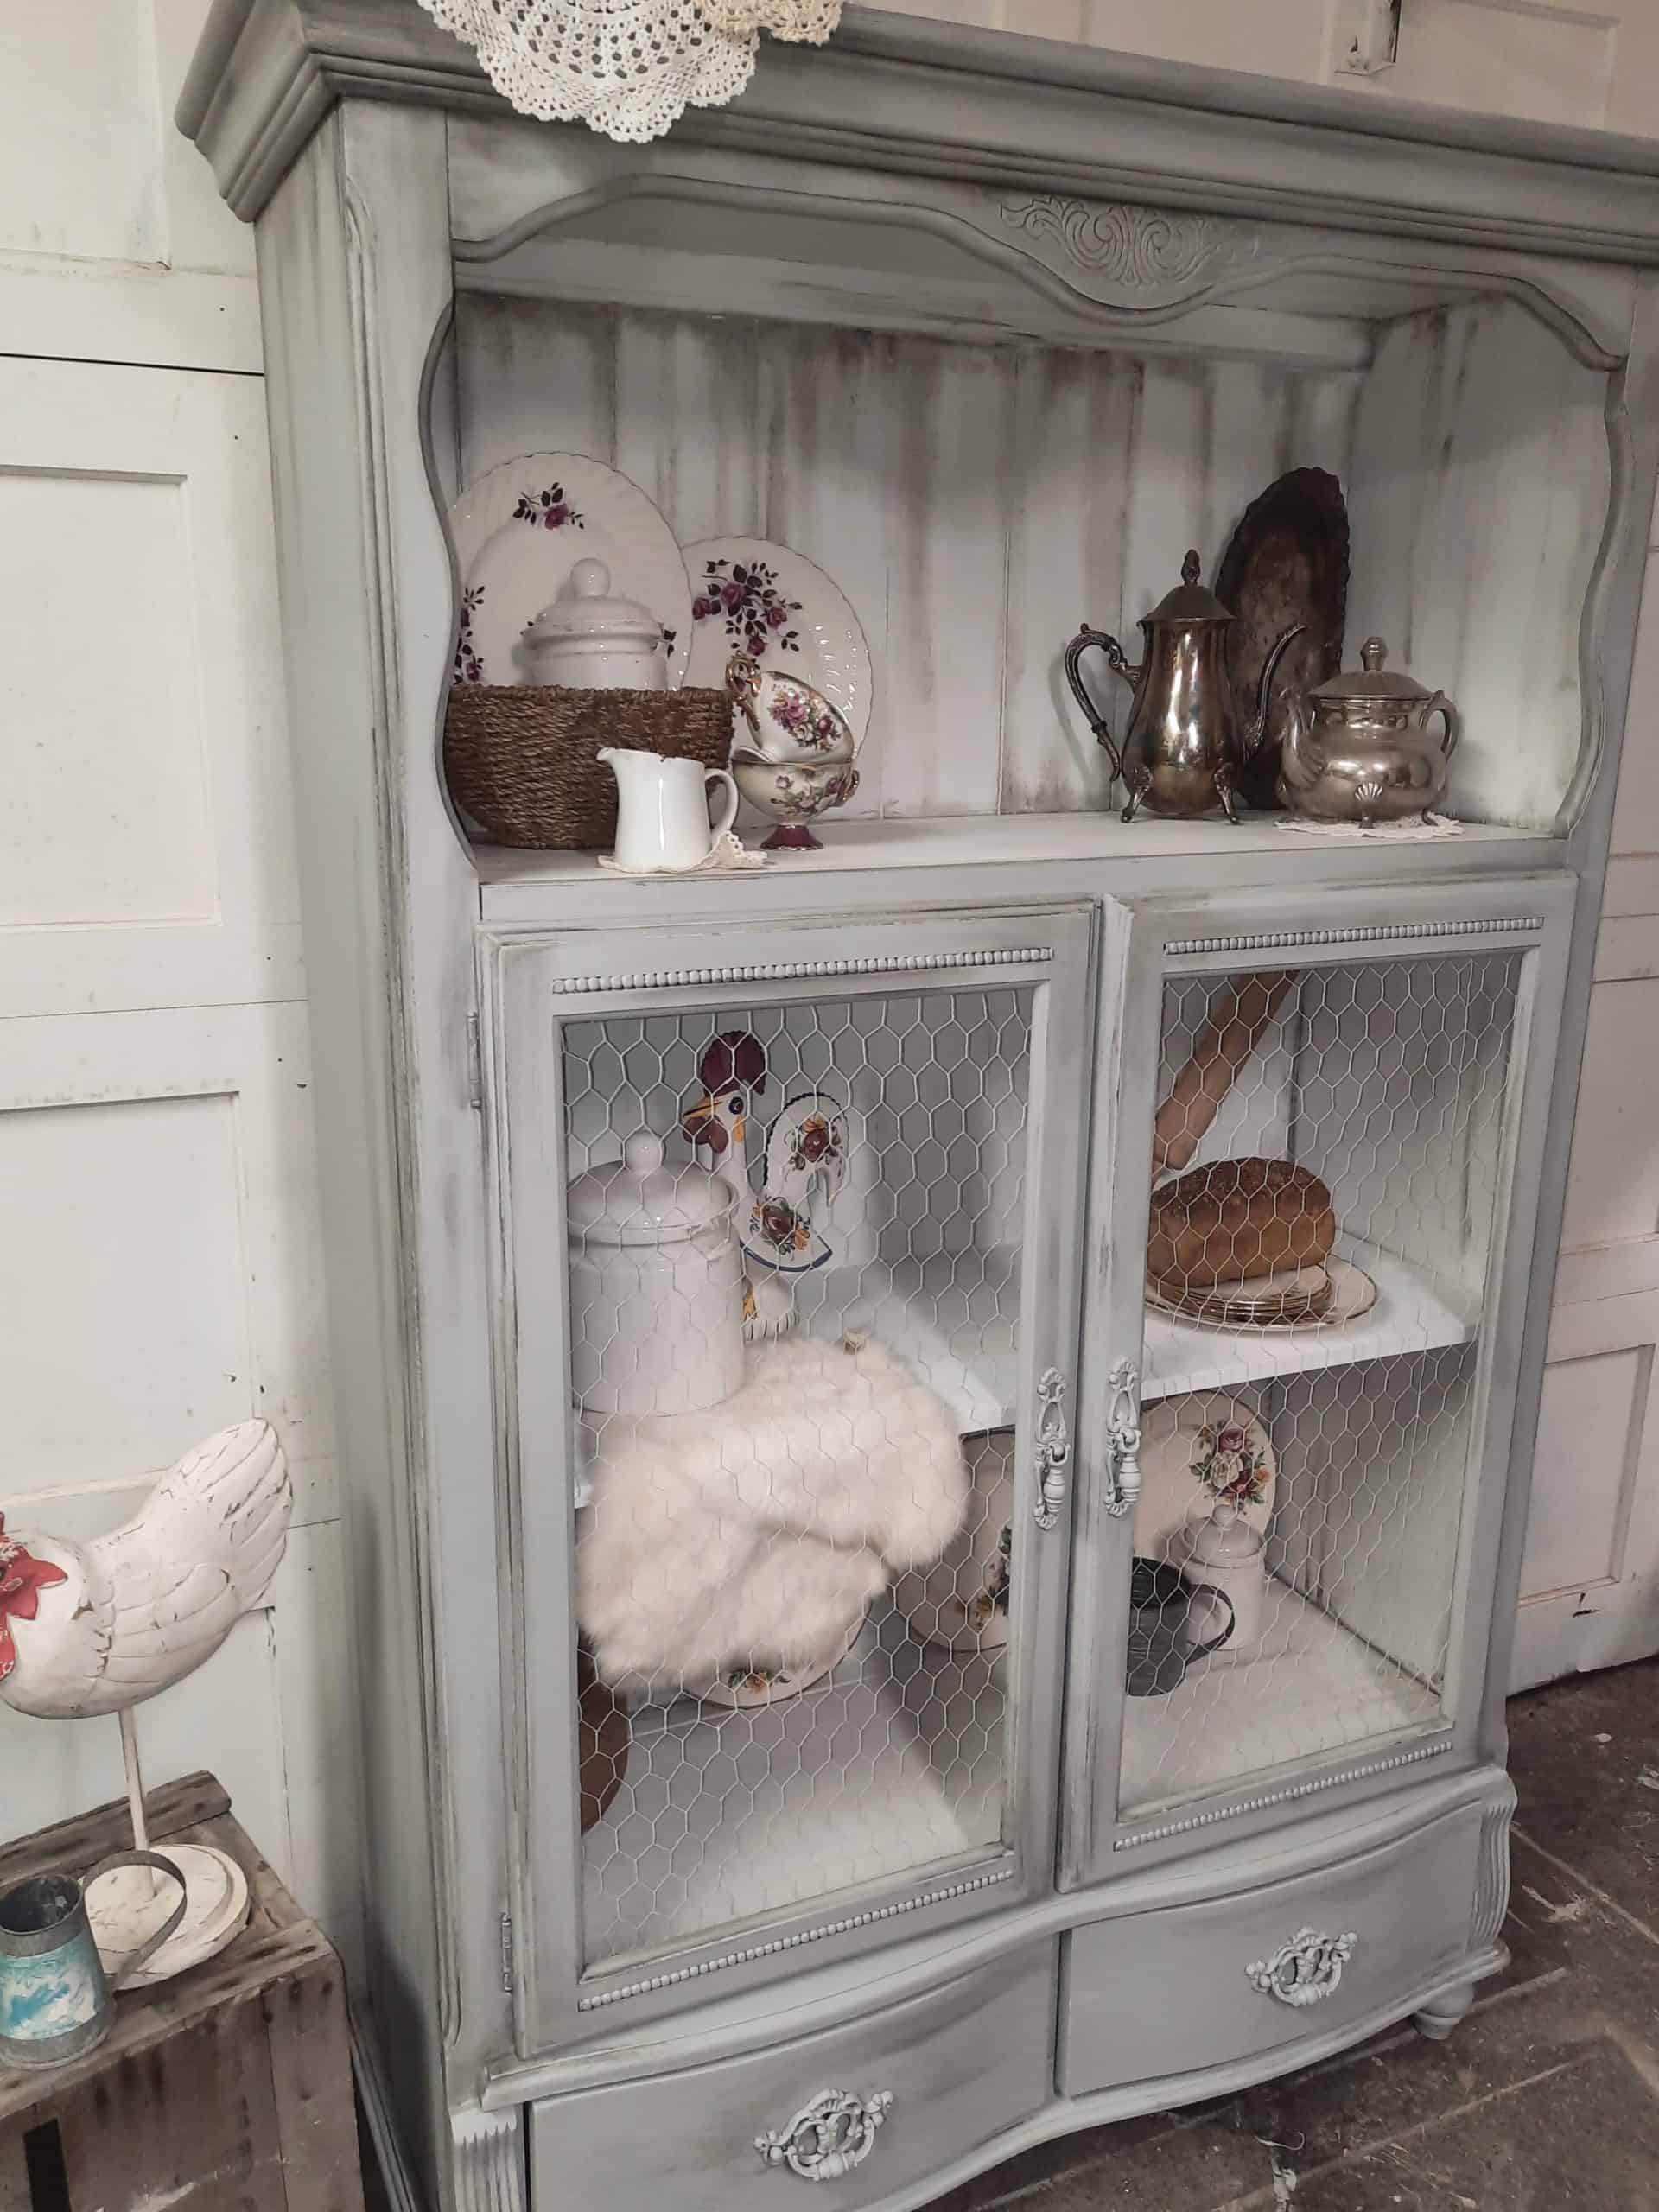
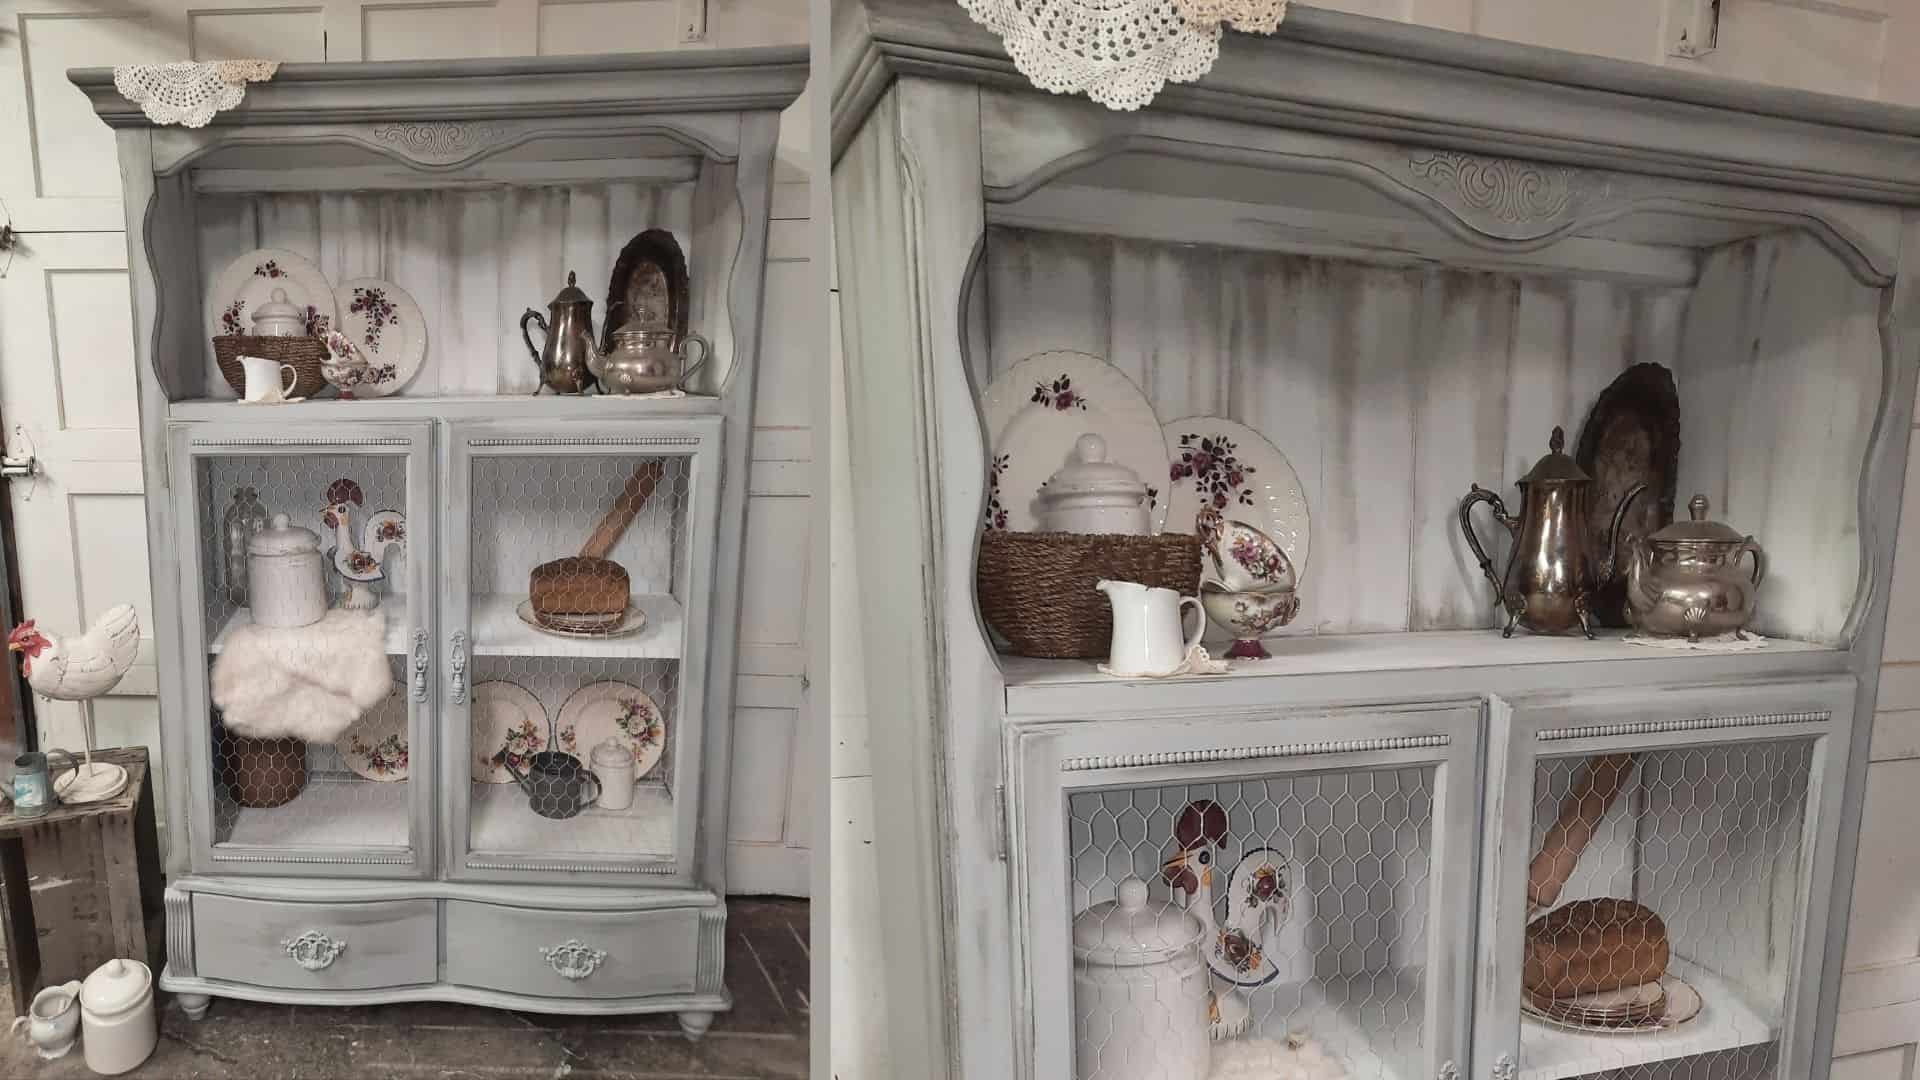
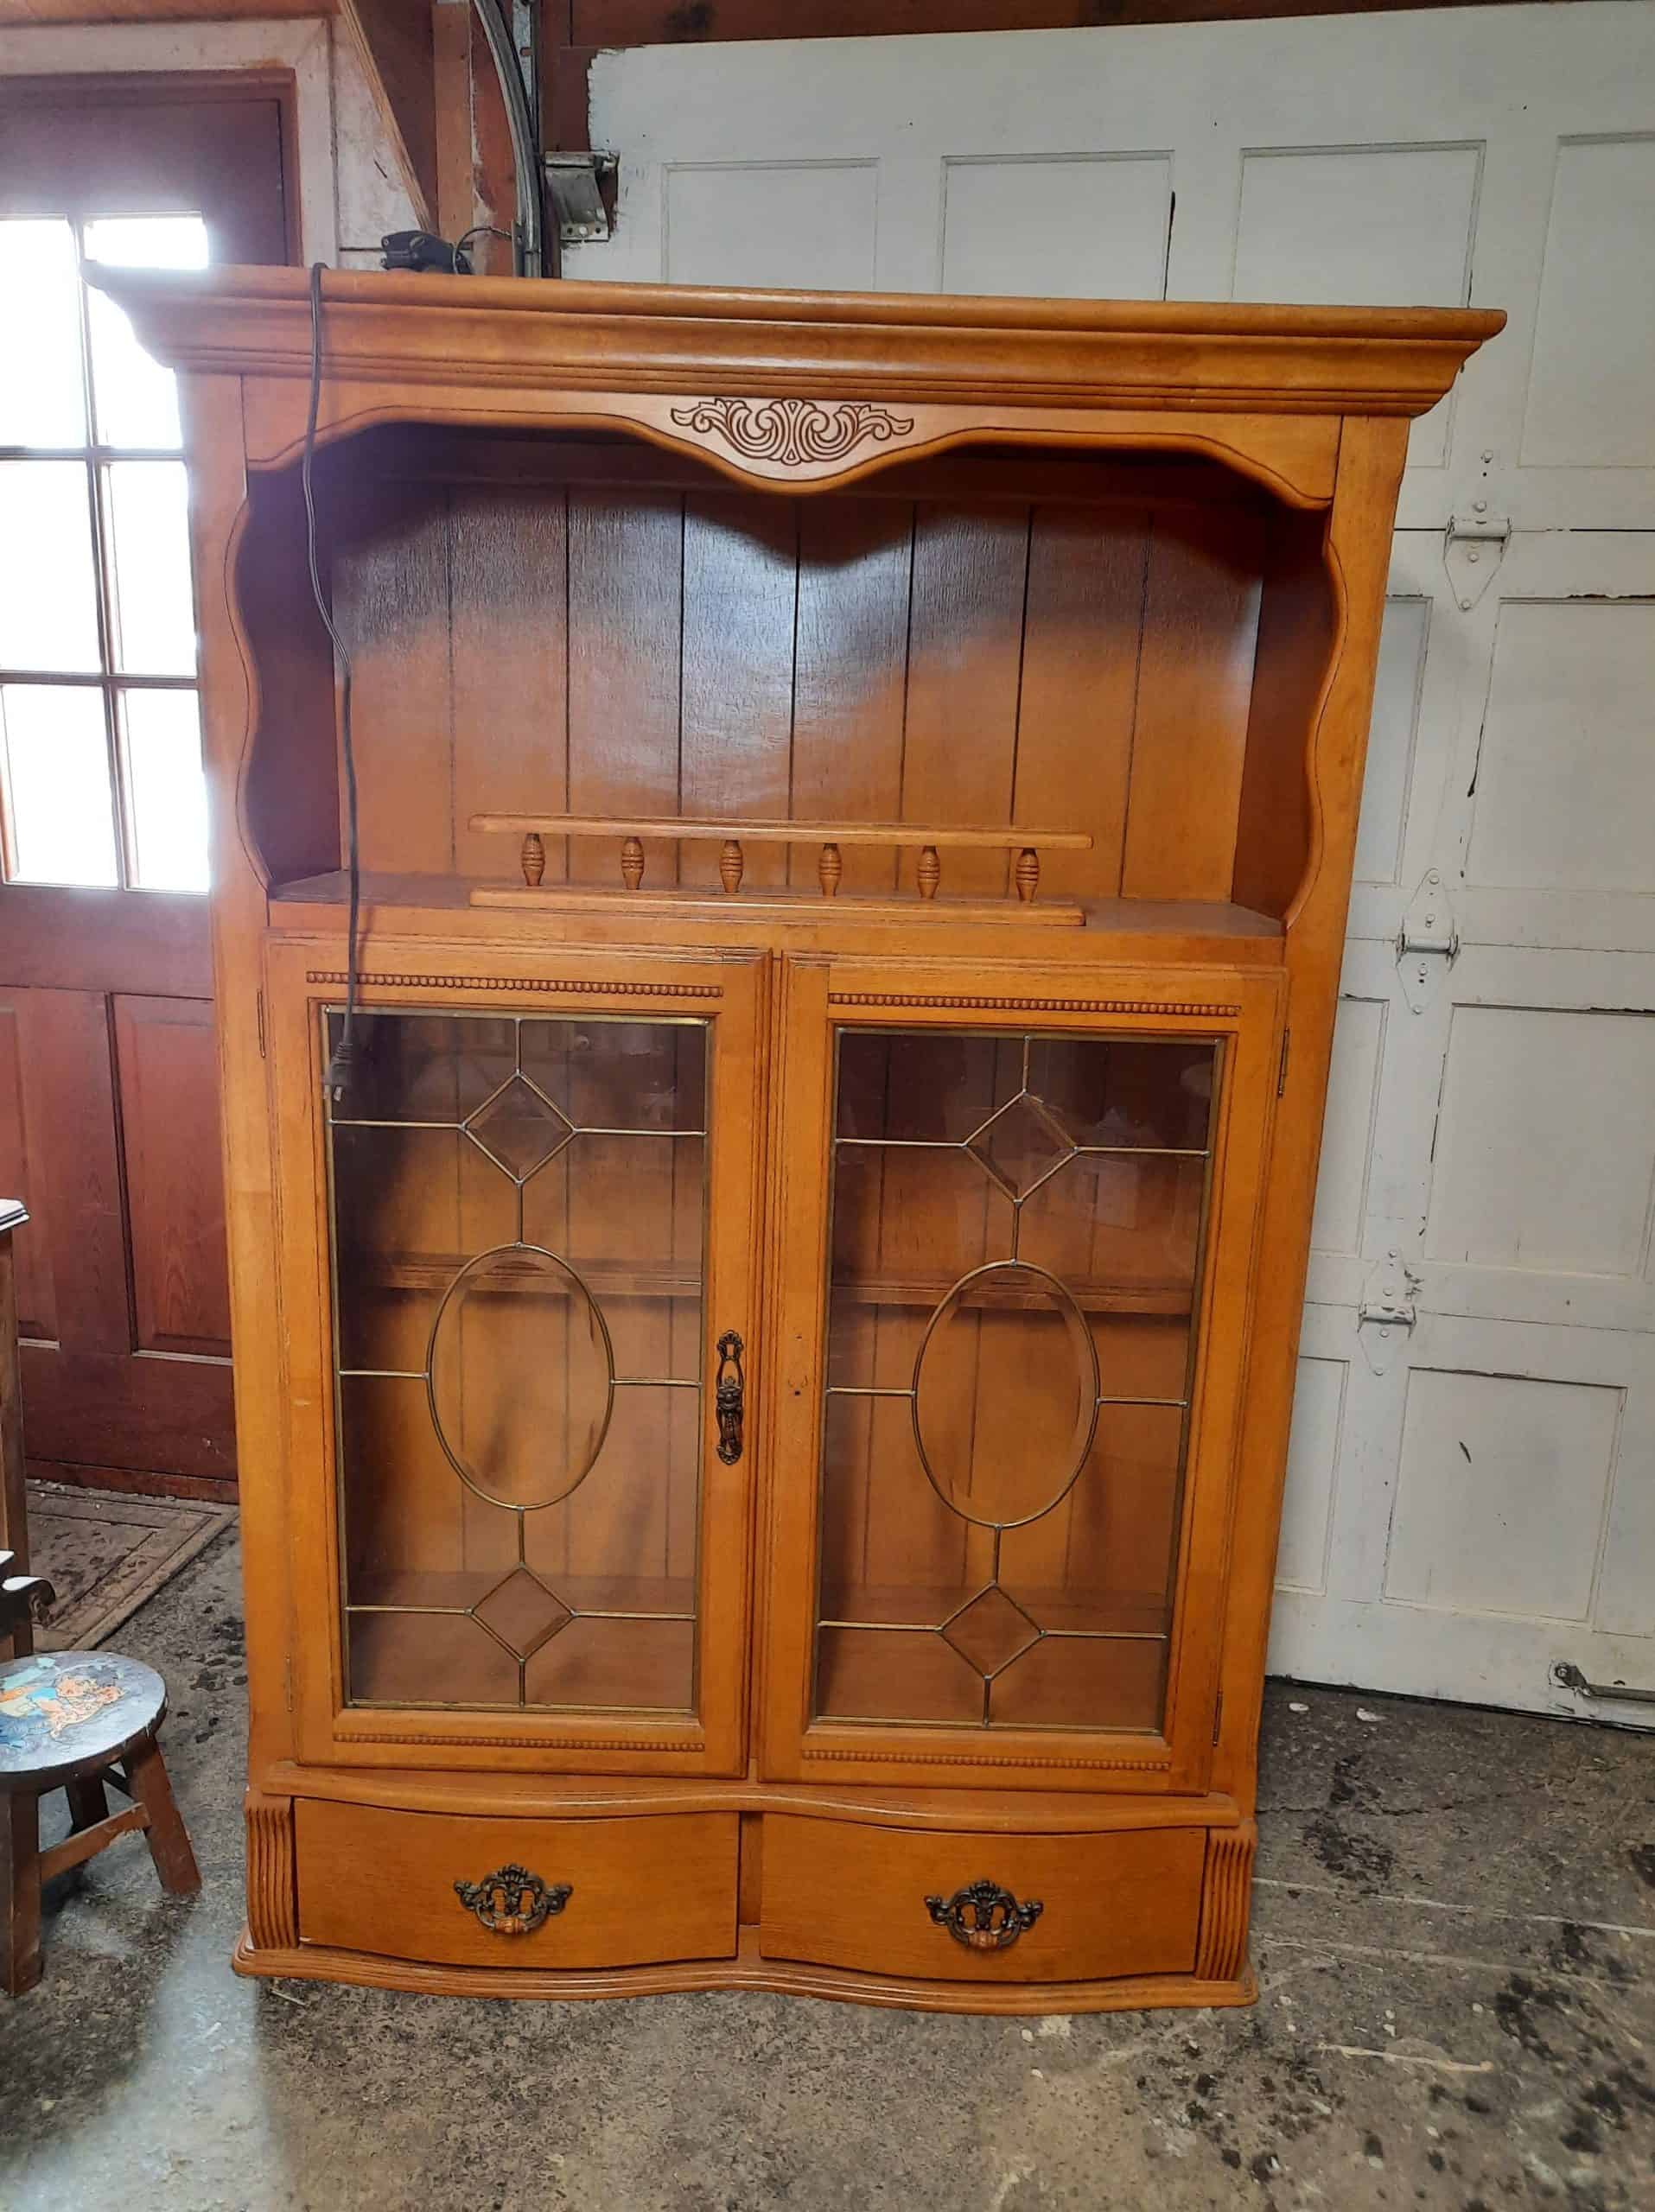
Furniture recovery is my great passion. This china cabinet needed a lot of love when I bought it, the legs were missing and the glass was heavily damaged. But despite its appearance, which would surely have put many people off, I fell in love with it when I saw it, and my head was already full of ideas for this project!
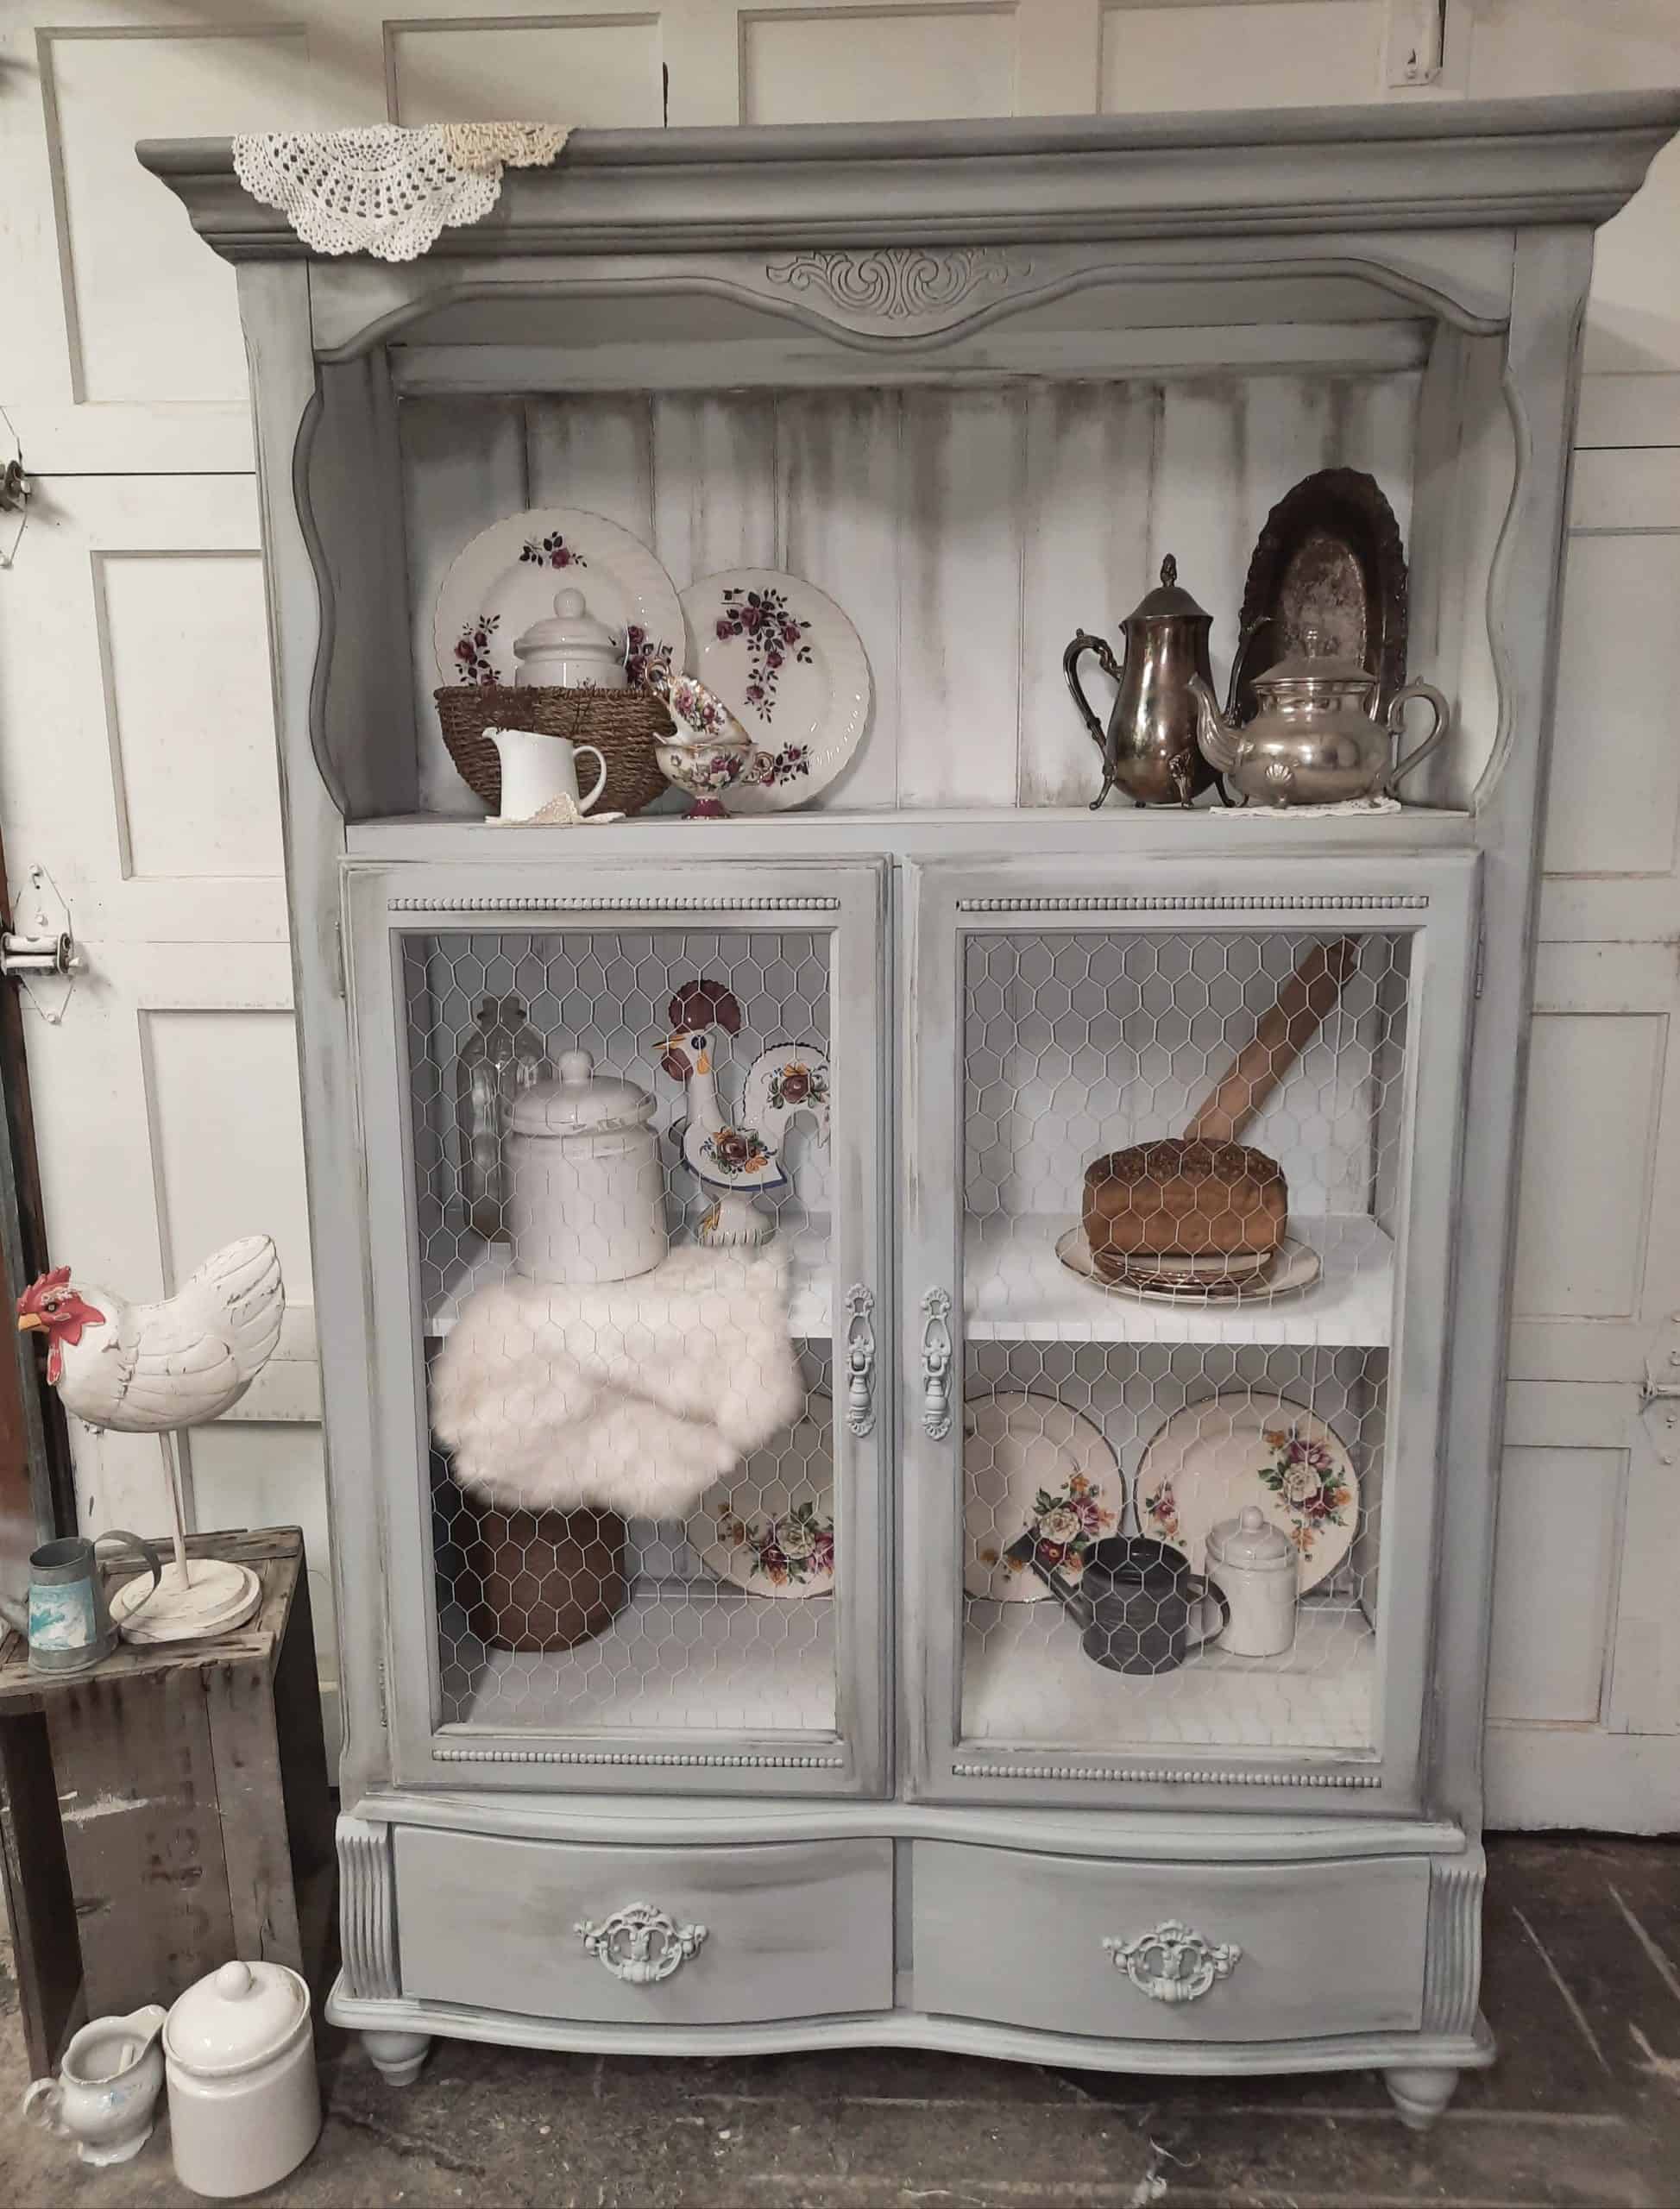
To give it the rustic chic look I had in mind, I opted for Colorantic’s beautiful Volcan color. I was sure this soft, warm gray would give it the chic look I wanted.
By reading on, you’ll discover all the steps needed to turn a retro-style solid wood china cabinet into a farmhouse-style china cabinet.
Happy reading!!!
List of products used :
- Colorantic cleaner and varnish remover
- Colorantic Volcan chalk paint
- Colorantic Cotton Ball chalk paint
- Colorantic natural beeswax
- Colorantic Tempête Grise wax
- European-style oval brush in beige Colorantic silk
- 16 mm Colorantic round beige silk brush (for wax)
- XLarge Colorantic round brush (for wax)
- Colorantic sandblasting block
- White hen brooch
- A stapler
- Blue shop towels
- Cloth
Preparation
I chose Colorantic’s nail polish remover and cleanser to remove all traces of grease. Then spray the cleaner on all surfaces and leave it to work for 30 minutes. Once the time has elapsed, using a bucket of hot water and a cloth, rinse well twice to remove all residues.
Since the old varnish was water-based, it was not necessary to apply Colorantic’s oil-based primer, Agrippe-tout. It would have been preferable to apply it if the varnish had been oil-based, as it would have enabled the transition from oil to the new water-based chalk paint.
Although Colorantic’s chalk paint adheres very well, I used the sanding block to scratch the surfaces to allow the paint to adhere better. I took care to remove all dust using a damp cloth.
Since Colorantic chalk paint also adheres to metal, I decided to paint the handles and hinges. To paint metal, apply a thin coat of oil primer.
The farmhouse-style china cabinet
Given the size of the surfaces, I chose the large European brush to apply the paint.
First of all, Boule de coton was used on the bottom of the china cabinet and on the shelves to brighten up the interior. This pure white matches perfectly with the Volcan grey used for the cabinet’s exterior.
Two coats were enough to cover the entire piece of furniture. Once the paint had dried, the chicken wire was installed with the stapler around the doors, replacing the original glass.
The finish
Using the thin side of the sanding block, I delicately sanded all the surfaces to soften any small brushstrokes that might have left marks. Once this was done, I made sure I dusted off thoroughly before applying the wax.
To apply the wax, Naturelle d’abeille, I used the XLarge brush. In small sections at a time, I applied the wax randomly. Once you’ve applied the wax, you need to polish it well, and to do this I suggest using paper towels. Continue in this way for all surfaces, remembering to change paper towels for each section.
Before applying colored wax, it’s important to apply the natural beeswax, as this will allow the colored wax to spread better and also allow you to make corrections if you’re not satisfied with the result. It’s a matter of taking a little natural wax on the end of a cloth and wiping off the dark wax, allowing you to start again.
Then the application of the wax, Tempête grise, with the 16mm wax brush aged the curves and corners of the china cabinet.
In conclusion
I’m very happy with the result, it’s exactly the style I had in mind when I bought the china cabinet. Giving a piece of furniture a second life is certainly a source of pride.
With its neutral tones, it will match any current décor in your home.
