Introduction
This week our Blogger Peggy explains how she created a beautiful kitchen island.
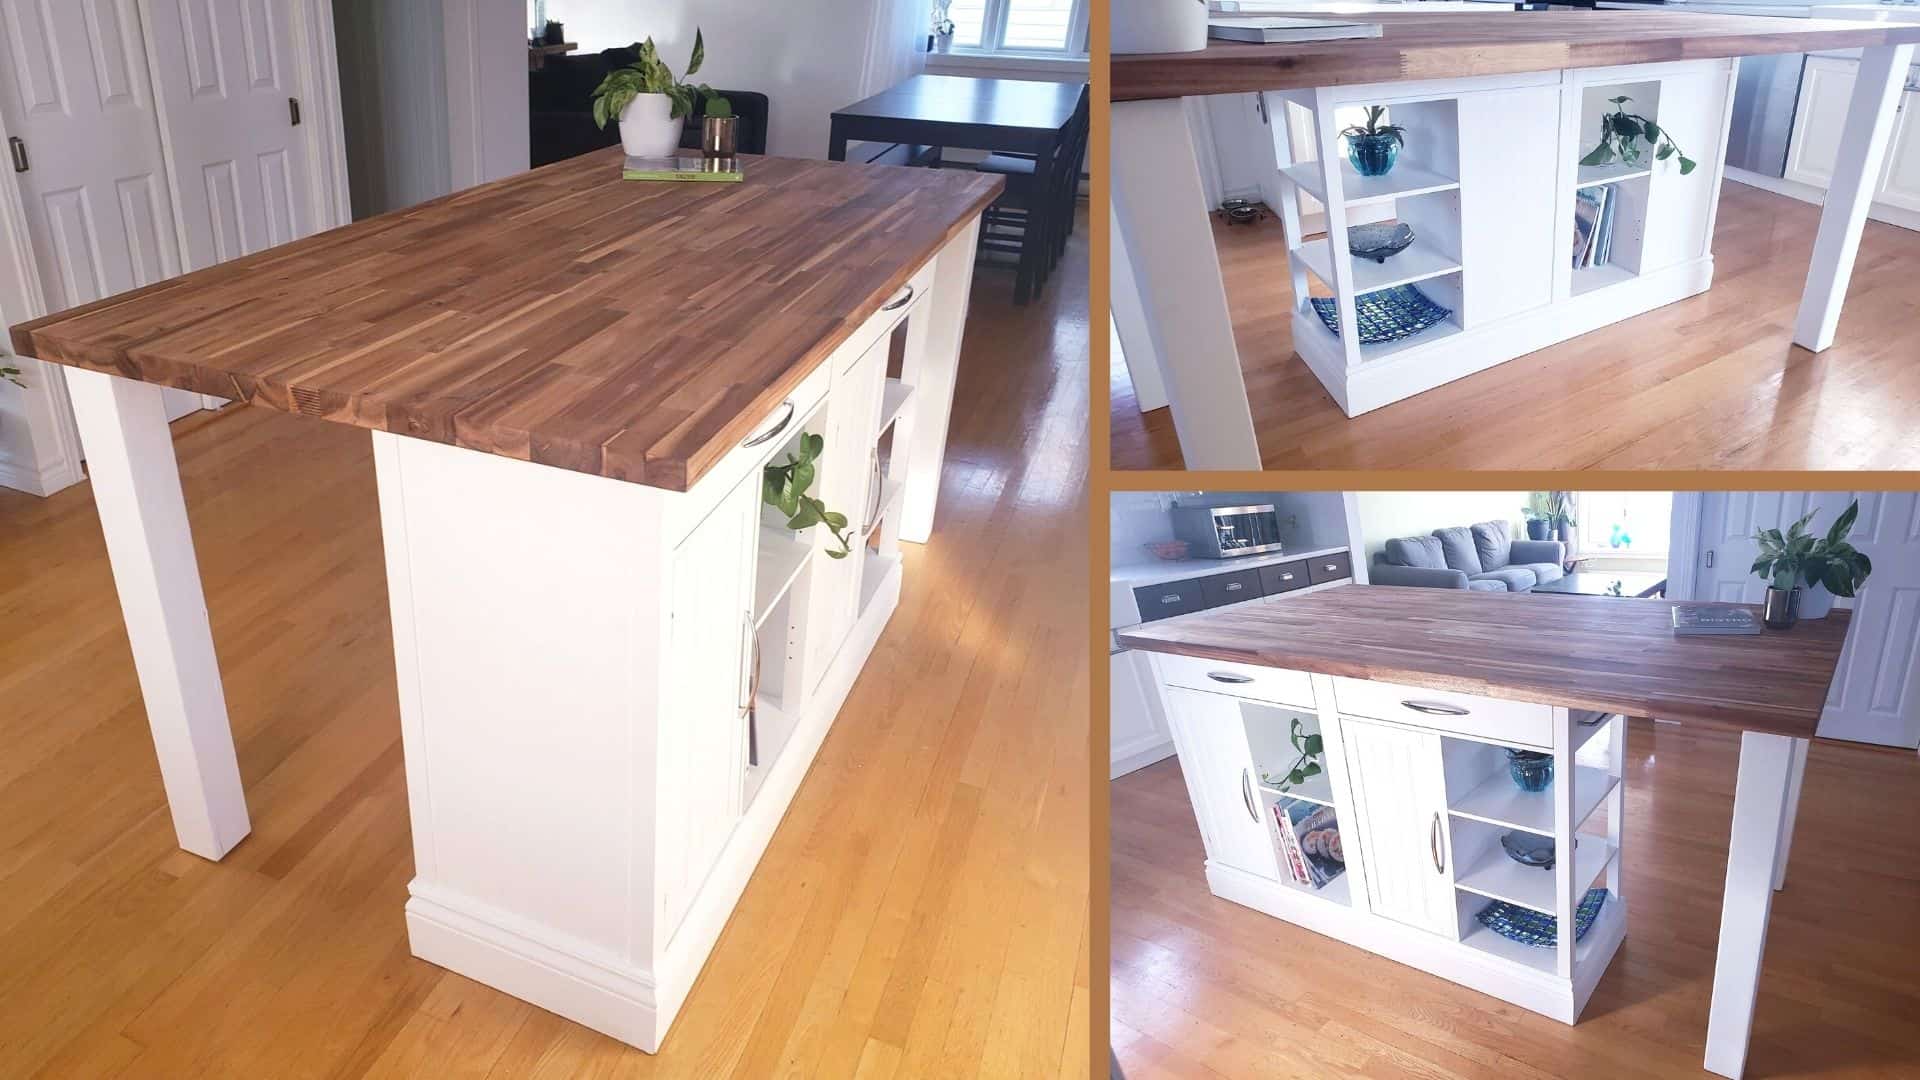
When buying our house, my spouse and I wanted a huge kitchen island for our evenings with friends or simply for moments spent with family. The kitchen was very big so that allowed us to creat the island of our dreams…I found a kitchen island on Marketplace. I am very lucky because my husband let me have the carte blanche to design the island.
Once I had bought the island all that was left to do was “Pimp” it up because it was a little bit ugly.
Products used
- Colorantic Sanding Block
- Cotton Ball: Colorantic chalk based paint
- Colorantic Matte Varnish
- Oval paintbrush by Colorantic
- Colorantic Velvet foam roller
- Colorantic Varnish Remover and Cleaner
- Tinted oil
- Spruce 4×4 to make the legs
- Wood counter

Step 1:
I started by buying everything that I needed. During Covid, I didn’t want to start a project and be stuck with an unfinished island in the middle of my kitchen.
Step 2:
I stripped the ugly countertop from the island and gave then gave the island a thorough cleaning. When I say thorough, I mean thorough!
I wanted to make sure that the surface was perfect because there were years of dirt and grime accumulated on it.
Step 3:
I applied the Varnish Remover and Cleaner everywhere and waited a good 30 minutes, before giving it another good cleaning with my product. My grandmother always said you can never be too clean.
Step 4:
I lightly sanded the surface, the part that was wood as well as the parts that are wood with a 120 grit sandpaper. This was my first experience with melamine.
Step 5:
For the 4 x 4 spruce legs, I sanded more intensely until the surface was smooth to the touch.
Step 6:
For the piece of furniture that was going to serve as the base of my island, I applied 2 coats of paint on the wood surfaces and 3 coats on the melamine, the island legs also required 3 coats of the colour Cotton Ball.
I took the time to lightly sand between each coat to get the best results!
Step 7:
For the finish, I applied 2 coats on Colorantic matte varnish. I hesitated between using the varnish or applying Natural Bee wax.
I haven’t quite mastered wax yet so decided that I wouldn’t take any chances on this big piece.
Step 8:
The piece of furniture and the legs were finished so I needed help from my spouse to put this puzzle together.
Step 9:
All that was left was for me to oil my wood countertop. I used an oil that was tinted a medium walnut that matched well with my existing cupboards.


Conclusion
Many hours later, I had the island of my dreams for a little less than $500.00! Once again the Colorantic products offered me a perfect finish and made the island the star of my kitchen. Now all that is left is to wait for Covid to be behind us to be able to have friends over and enjoy a drink in good company….and to find some benches on Marketplace.
Now that you see how it was done you can now create your personalized island. Isn’t that wonderful

Related Posts